Keepitsimplesummer.com
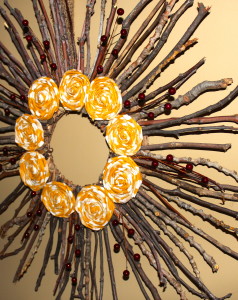
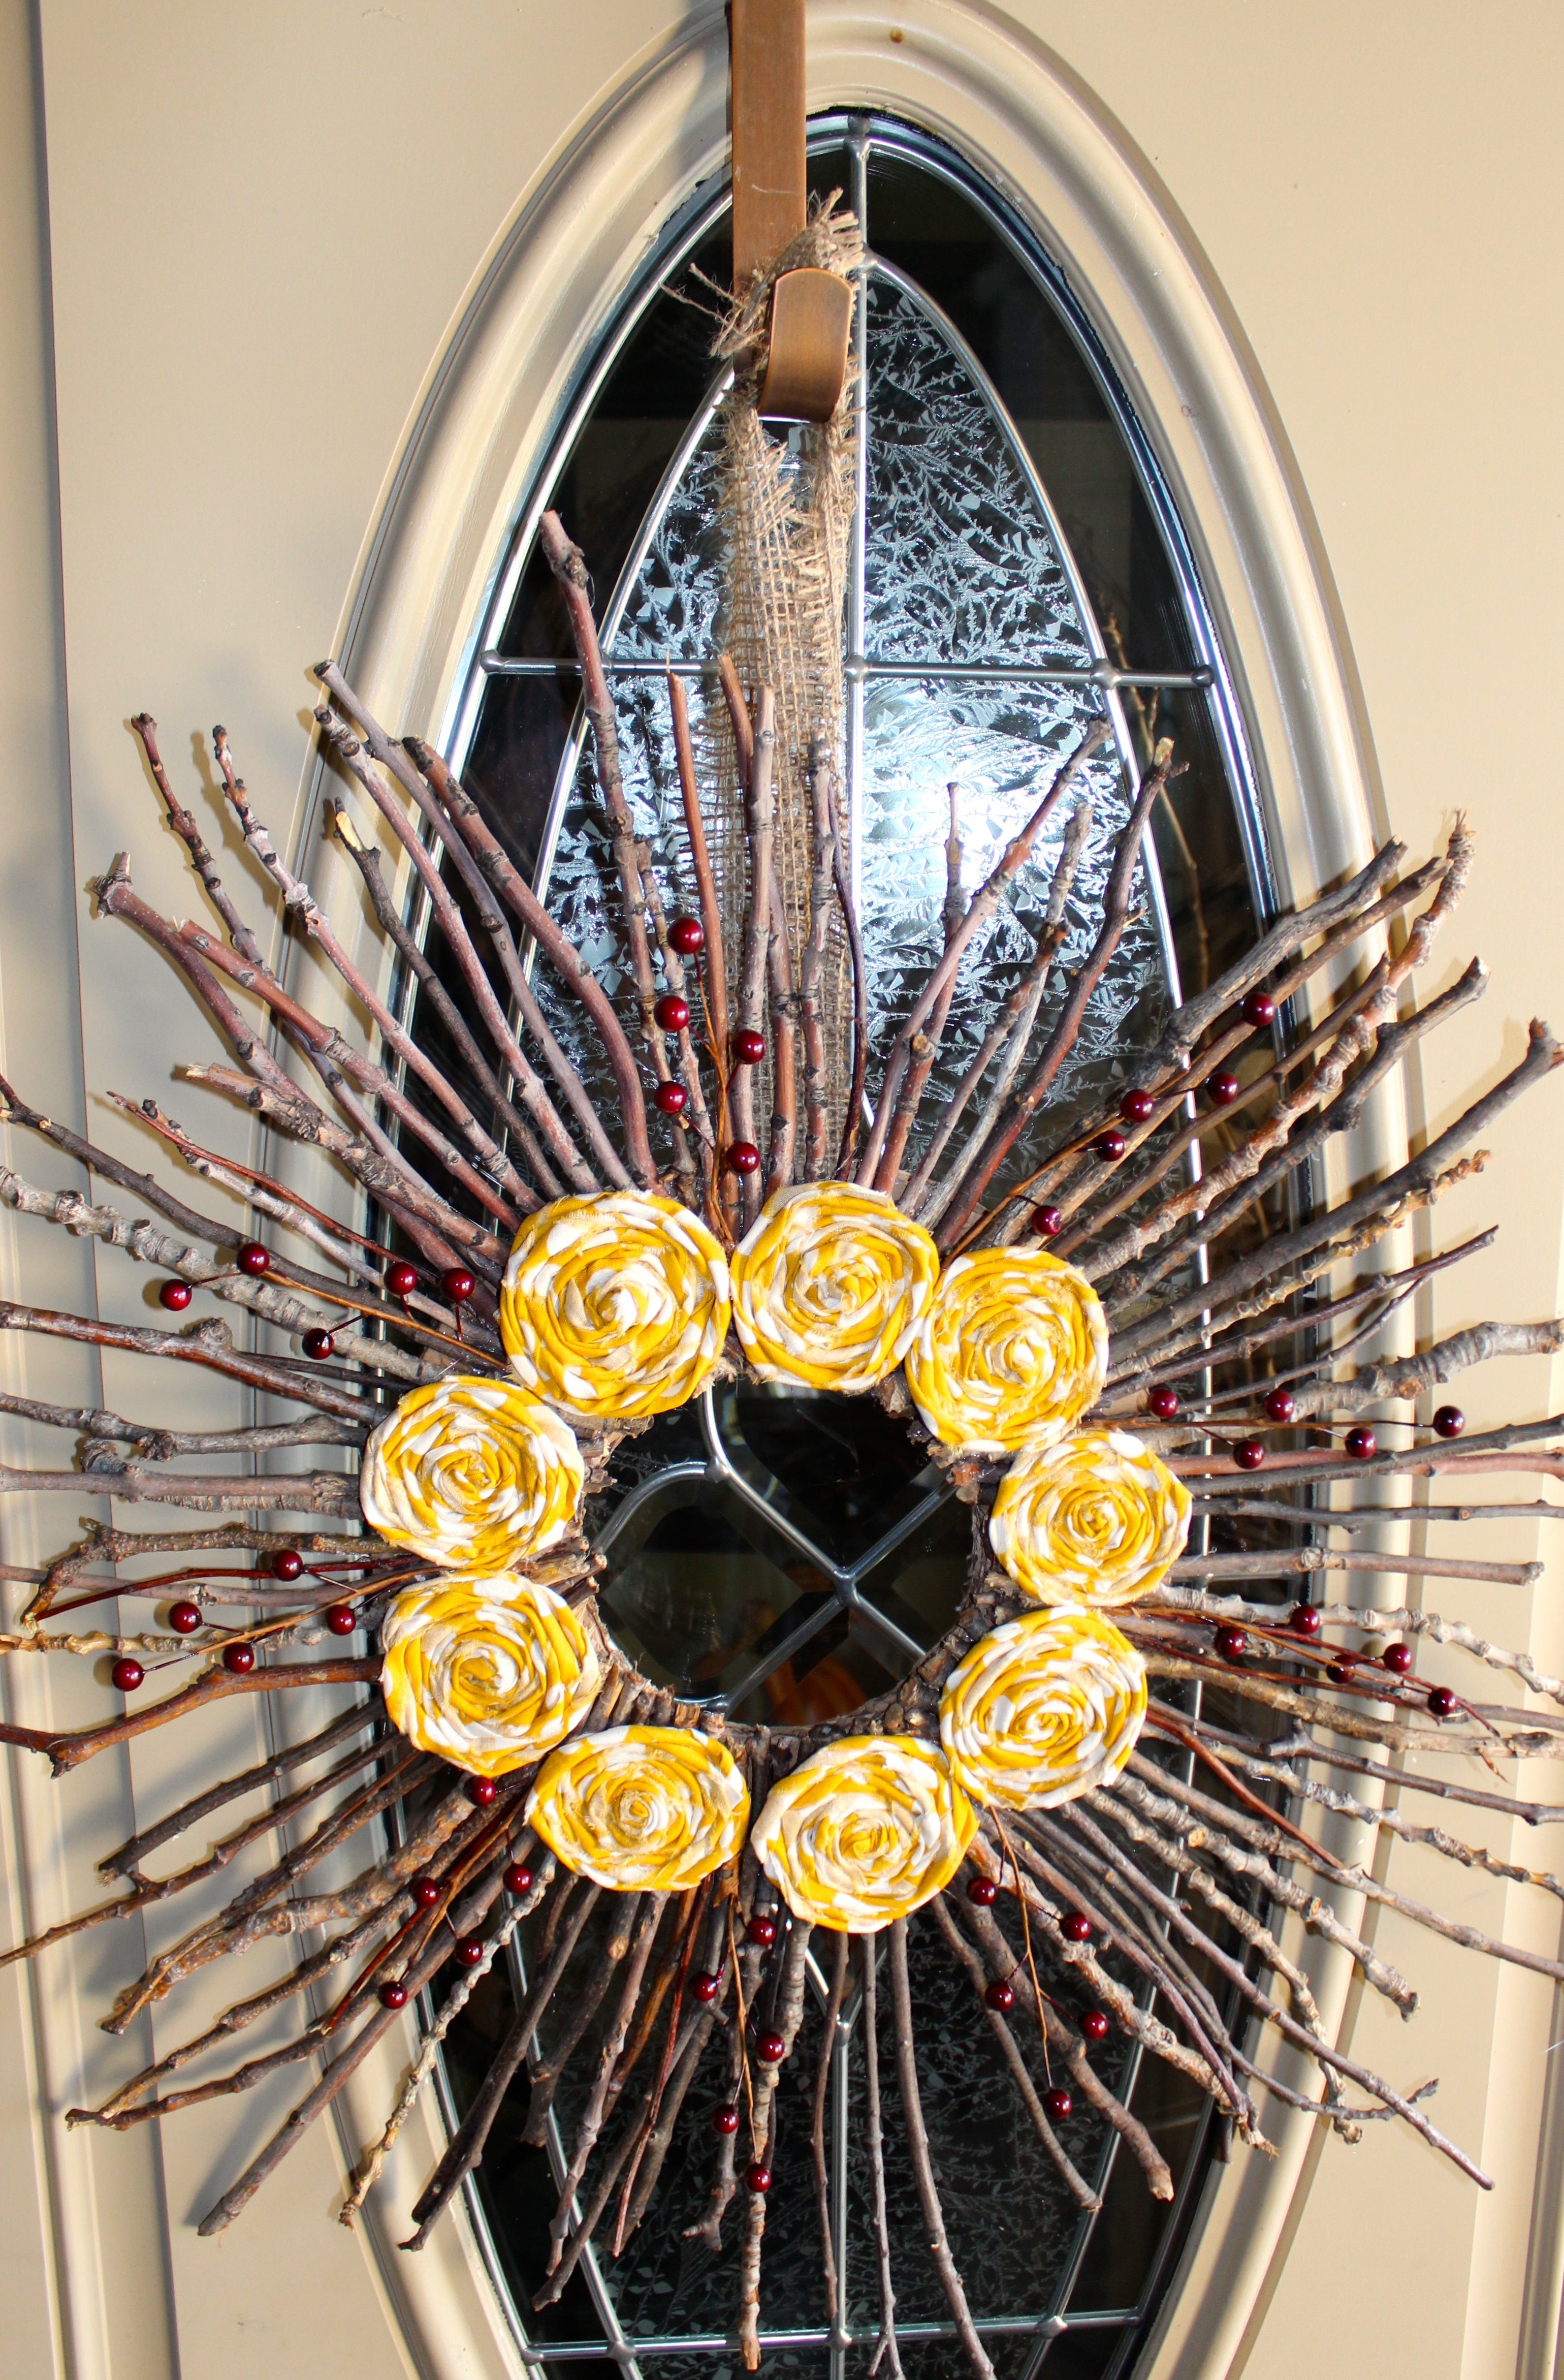
I’ve got to say, I love, love, love this wreath. It was so fun to make and I love how it turned out! The best part…..that it was literally free to make. Well, I guess it cost a couple of dollars because I did spend money on the scrap material I used for the rosettes, berries and the glue, so maybe $3-$4, but that’s it. I’m sure that it’s not everyone’s cup of tea, but it has got to be one of my favorite things I’ve made so far.
I got the idea while scrolling around on Pinterest for Fall wreaths and saw the basics of how it was made at Yellowmums. She even has a link for people who don’t know how to make rosettes (luckily, I already did).
First up, twig collecting. Between the park in town and the dead tree in our backyard (bummer I know, we need to take care of it). I was able to procure what I thought would be an adequate amount. The kids even got a trip to the park out of it.
Then I used and old amazon box, found a bowl in the size I thought would work, flipped it over and traced the circle on two sides from the box. Then I found a smaller bowl and did the same for the smaller hole for inside the wreath.
I cutout my cardboard circles and hot-glued them together. I think the other wreath put burlap or material in-between the two pieces of cardboard, but I didn’t notice that until after I’d already glued-gunned those suckers together….my bad. I was just too excited, I really wanted to get this done!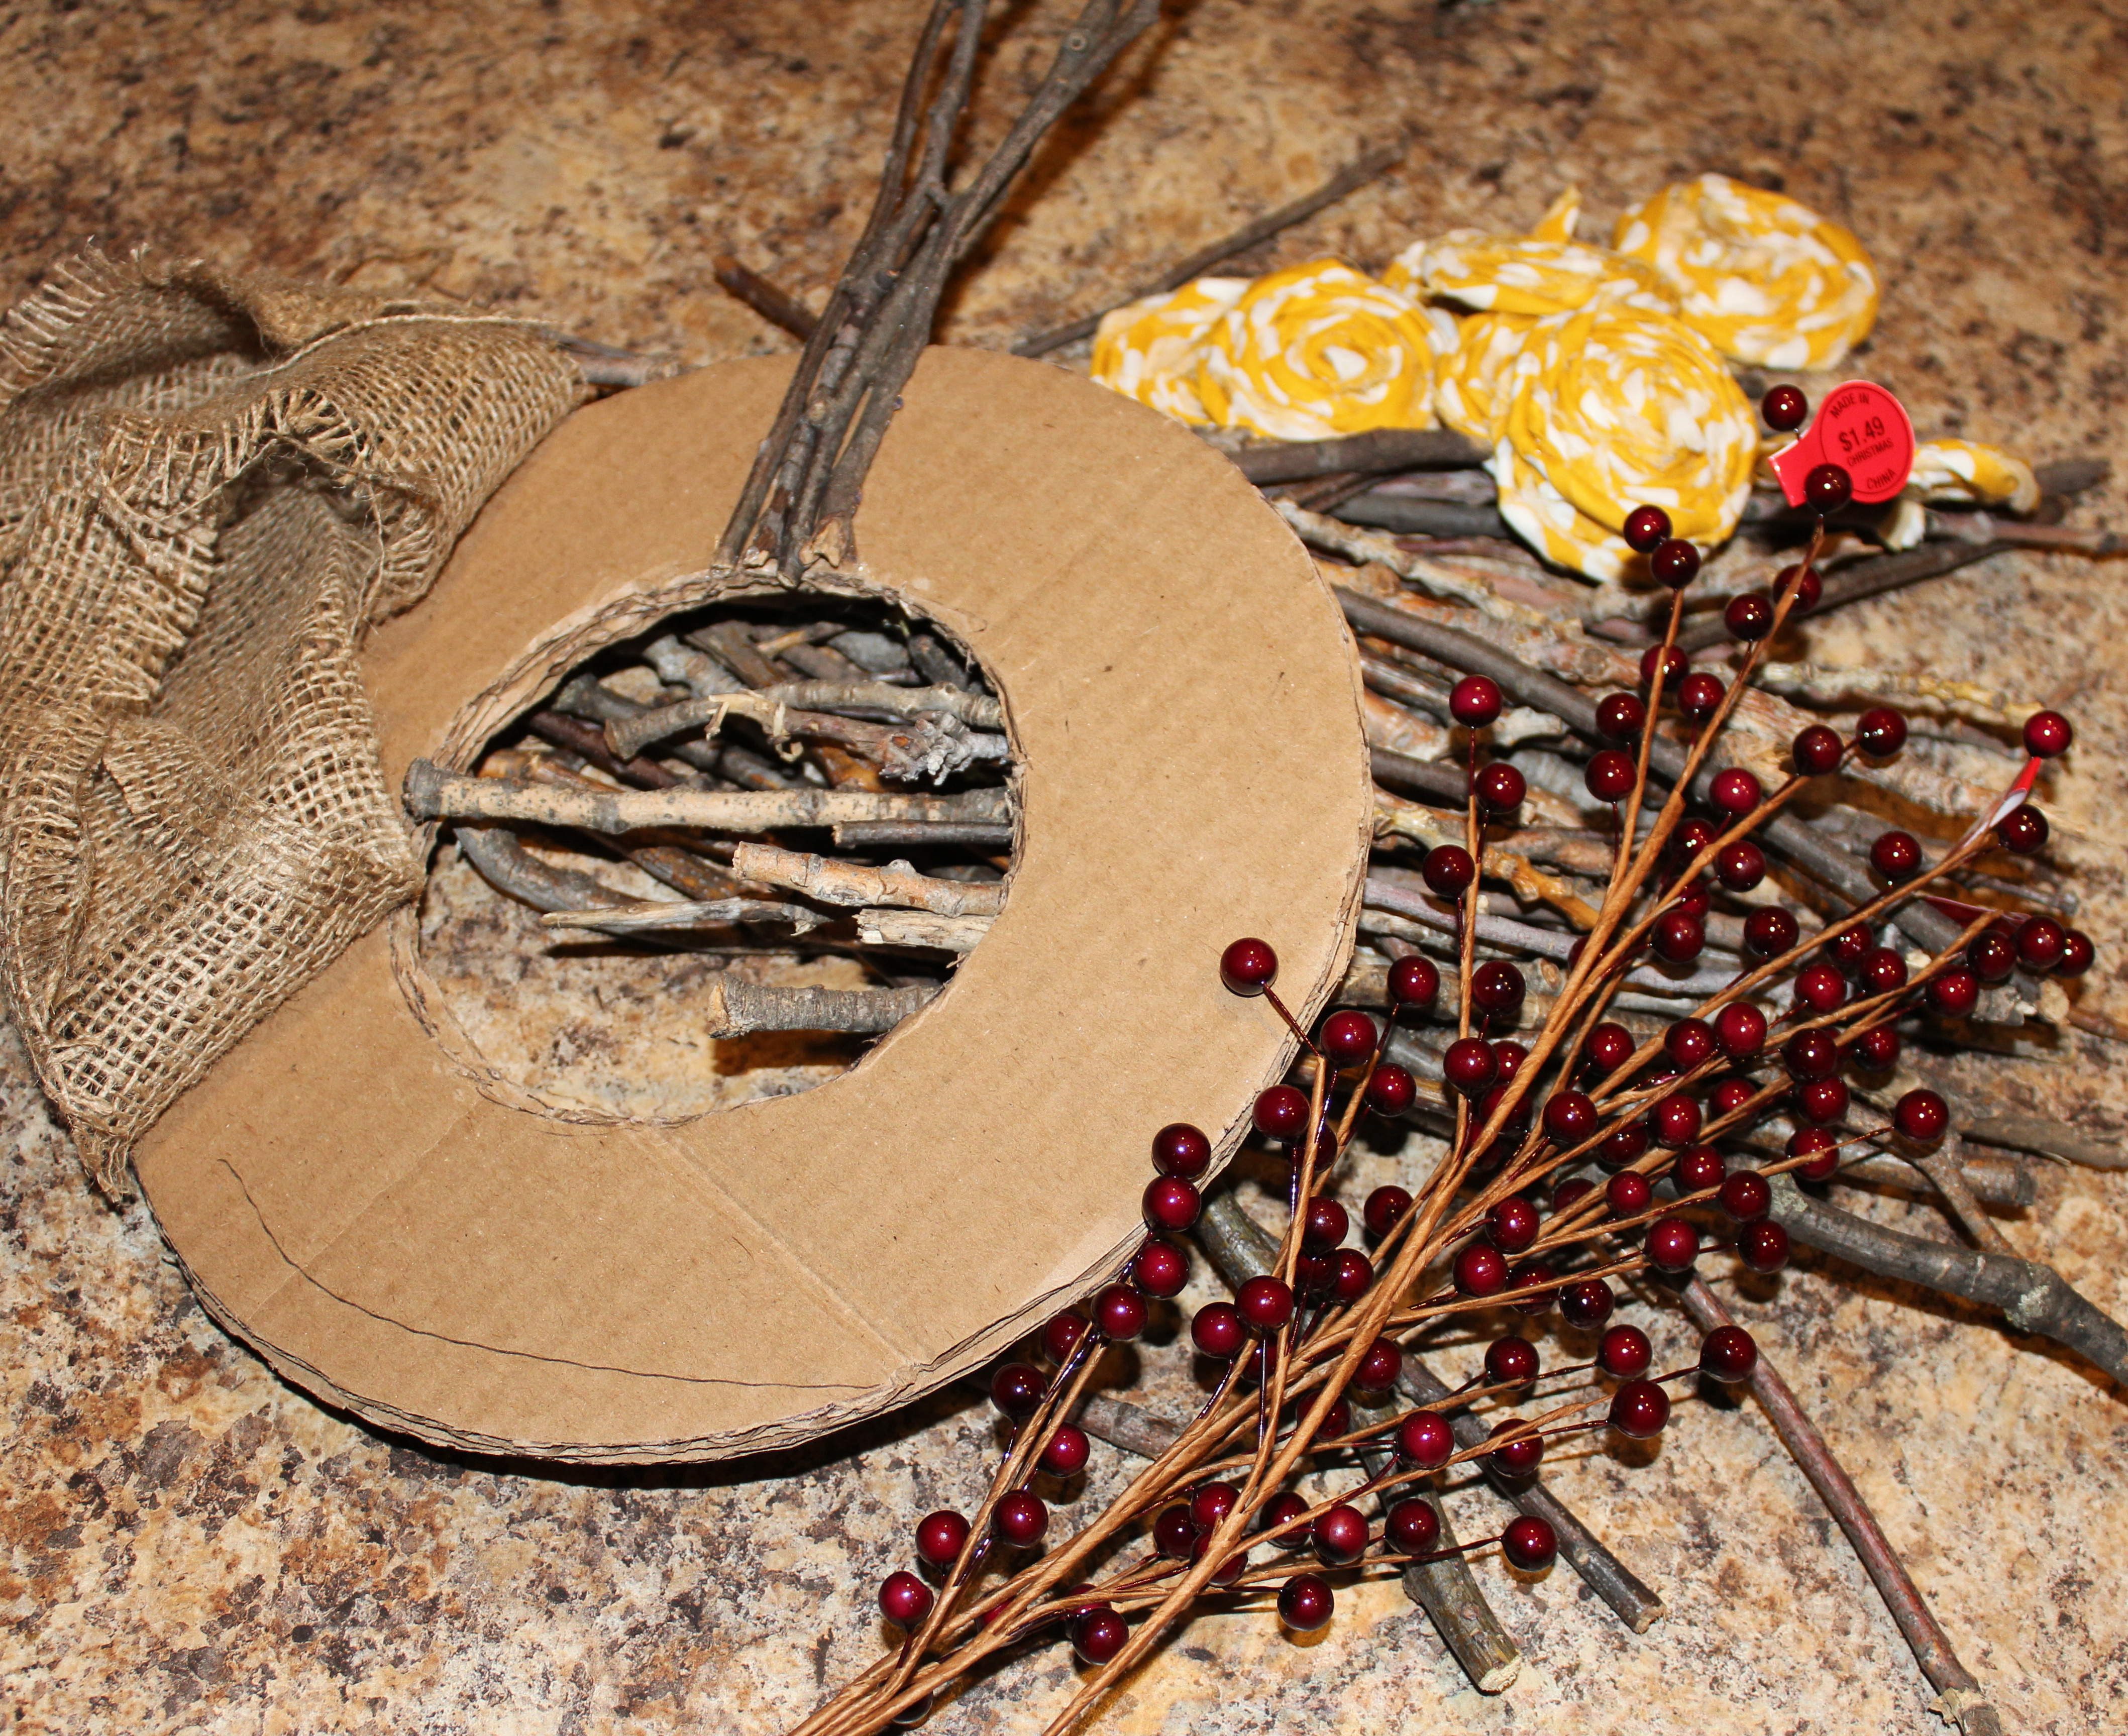
I decided to use burlap to hang the wreath from the door, so I put that on next and secured it with a dab of glue.
Now the fun part…..I started to hot-glue on the twigs. I decided how big I wanted the wreath to be and then had to break some of the twigs accordingly. It was like a puzzle putting it together because you have to find twigs that fit together in order to not have huge pieces of the cardboard showing through. At least that’s the look I was going for.
Once finished gluing the twigs, I arranged my rosette flowers around the inner circle and hot-glued those babies as well. (I had made my rosette flowers at night while watching my episodes of Fringe on Netflix).
Last step was to arrange some fall berries I had gotten at the craft store to bring in a bit more color. I ended up using two bunches of berries on the wreath. I cut the stems off with wire cutters, put a dab of glue on the end, and then jabbed them in-between the twigs where I wanted them to go.
Ta-dah! Finished wreath!
Keepitsimplesummer.com
I think I might add some sparkle to it somehow, as we get closer to Thanksgiving, I feel like everything should be sparkly at the holidays, but I do love it just how it is. What do you think?