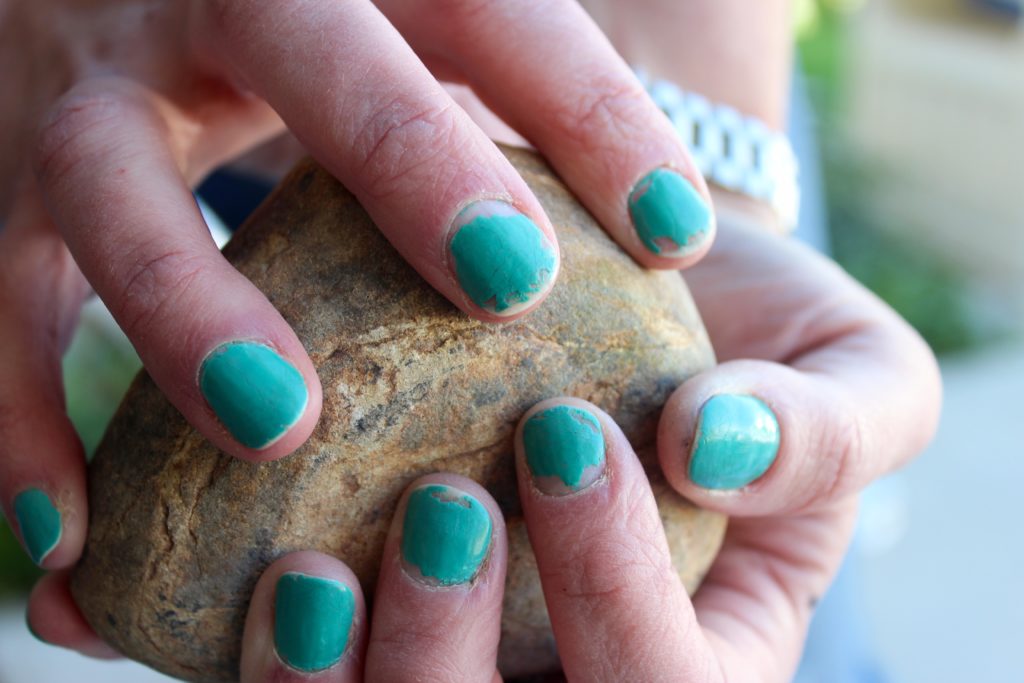
As you wonder “what the hell did she take a picture of her chipped ass nails for?”, just hang on and I’ll explain. So, before I had kid #4 I somehow managed to find the time to get manicures and pedicures pretty regularly. By regularly, I mean once a month or so. For me that was pretty good and I could keep a gel manicure looking decent for 2-3 weeks. If I put gel polish on my toes it could last for over a month.
This year, however, I rarely manage to get a mani or pedi and I blame Kena. Those babies are just so needy and time consuming. (I joke, I joke).
As a result, I’ve had to take matters into my own hands (my own hands, ha, see what I did there??) and most of the time it isn’t very pretty. I suck at painting my own nails and then within a day or two some paint has chipped off and they look even crappier.
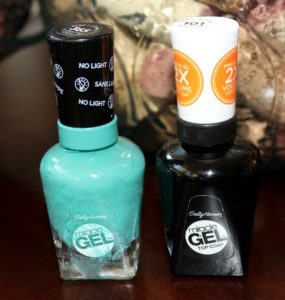
I have been practicing though and I’ve tried multiple brands of polish hoping for a longer finish, but had no luck until recently. That’s when I tried Sally Hansen’s Miracle Gel Top Coat.
LOVED IT.
So, back to the picture above. My nails in the picture are what my nails look like after day 7 of being painted. Day 7!!
That’s pretty damn good considering that during those seven days I was at the beach, pulled weeks, made about 15 smudge sticks, washed my hands 3000 times (damn dirty diapers), plus all the normal mom crap like cleaning, laundry, dishes, etc. and I never wear gloves. I’m the worst at remembering to put on lotion (obviously) and only on day 5 did I get my first chip.
 Super impressed. Super easy.
Just like a gel mani but no light needed and it dries FAST. Just paint two coats of the color polish and then one coat of the Miracle Gel Top Coat. Give it a try and let me know what you think. That is all peeps. 🙂
Hugs and love,
Summer